
# Variables & Parameters
# Variables
At this point, your pipeline is almost ready but we can still improve it. Let’s start with the name of the pipeline. You may have noticed that its name is composed of the Git commit date and Git commit message.
Let’s change it by adding Git Branch using $(SourceBranchName). For example:
name: ‘Build_$(SourceBranchName)’
In fact, Azure Pipelines provided a lot of predefined variables to customize the pipeline. Here’s a short list of the most common one:
| Name | Description |
|---|---|
Build.BuildId | ID of current build |
Build.SourcesDirectory | Path of the directory where the Git repository is checkout |
Build.SourceVersion | Git commit sha1 |
Build.SourceVersionMessage | Git commit message |
One important variable is System.debug. By setting this variable to true it will print detailed logs. It’s useful to debug pipeline problems.
name: 'Build_$(SourceBranchName)'

variables:
  - name: 'System.debug'
    value: 'true'
You can also create your own variables to avoid code duplication and facilitate maintainability. Variables can be set at pipeline, stage or job levels. For example, you can create a variable defining the VM image of the agent.
Git branch
pipeline-variables
# Parameters
You can define variables inside your pipeline, but you can also define runtime parameters. One developer in the team wants to build only the backend application. With this documentation, you can create a runtime parameter that will define which part of the pipeline will be run.
Once your parameter is defined, you can see it in the interface:
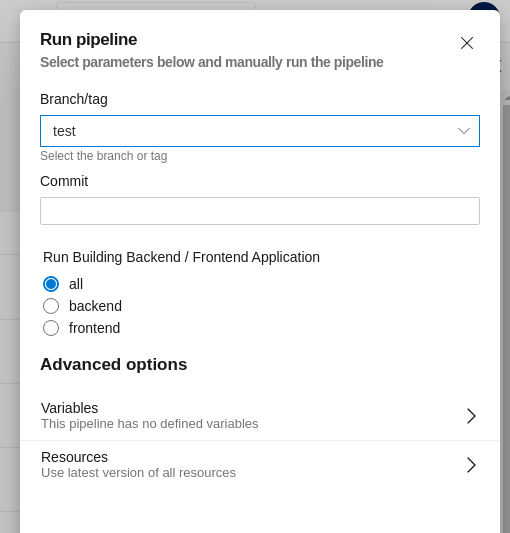
Now, you have to modify the Backend and Frontend job by adding a condition attribute. This attribute will activate the jobs by testing the value of your parameter. To help you, here’s the link of the documentation.
Git branch
pipeline-parameter